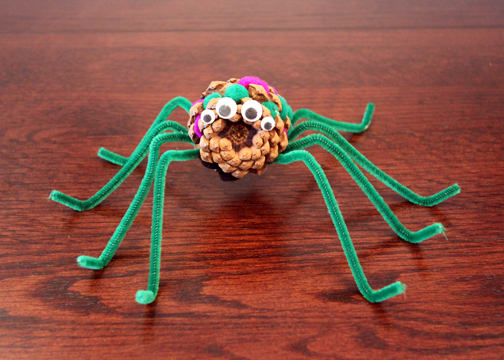
Looking for a fun and spooky Halloween craft for kids? This pine cone spider is the perfect DIY project! It uses simple materials like pipe cleaners, googly eyes, and pom poms to create a creepy-cute spider. Perfect for preschoolers, classrooms, or fall craft parties!
Kids love counting the legs and eyes, choosing their pom pom colors, and giving each spider a name. Plus — each one turns out totally unique!
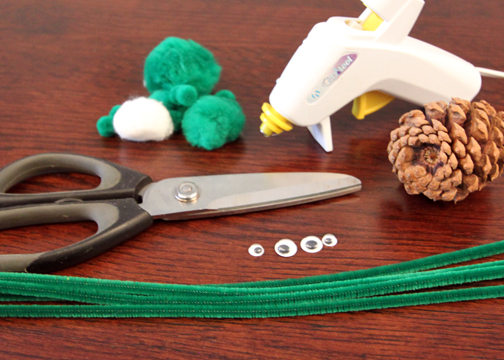
🧰 What You’ll Need
1 round pine cone
4 pipe cleaners
1 bag of pom poms
Googly eyes (2–8, your choice!)
Scissors
Low-temp glue gun
(Optional) Cotton balls for stuffing
🛍️ Supplies You Might Need
We used these exact (or very similar) supplies — all available on Amazon:
These are affiliate links. As an Amazon Associate, I earn from qualifying purchases — at no extra cost to you. Thank you for supporting Pinecone Crafters!
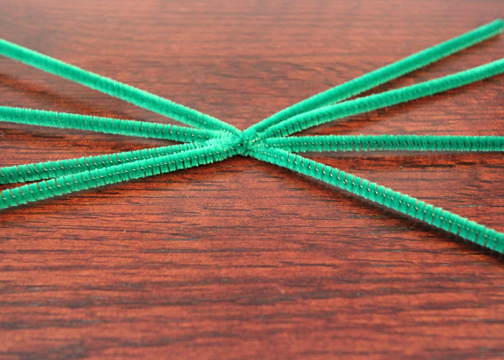
Start by cutting about 1 inch off each pipe cleaner. Line all 4 pipe cleaners up, trim the ends together, and twist them tightly in the middle. This creates 8 evenly spaced spider legs.
🧠 Tip: Give the pipe cleaners one full twist so they don’t shift later!
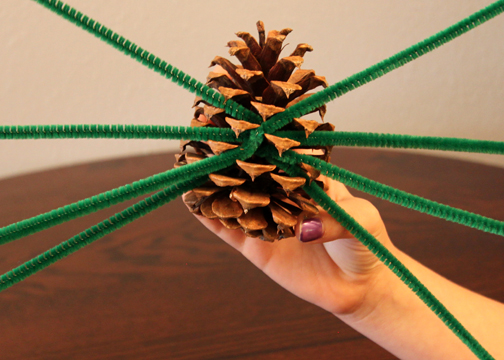
🕸️ Step 2: Attach the Legs to the Body
Now gently push the twisted center of the legs into the underside (belly) of the pine cone. Spread them out evenly between the pine cone petals to resemble real spider legs.
Once you’re happy with the position, secure them with your low-temp glue gun. (It’s okay if your kiddo goes overboard with glue — it’s hidden under the belly!)
🕸️ Step 3: Shape the Legs
With your spider on its back, bend each leg back and outward from the body. Then, using your finger to stabilize the pine cone, bend the last inch of each leg downward to make “feet.”
You’re aiming for a natural spider stance — slightly creepy, but still cute.
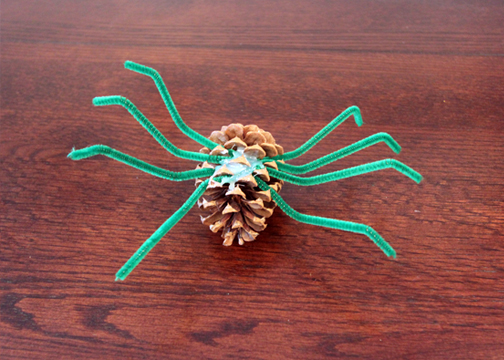
🕸️ Step 4: Decorate Your Spider
Flip your spider right side up. Time for the fun part: decorating!
We added four googly eyes, but you can go wild — 2, 6, or 8 eyes all look awesome. Then stuff pom poms into the pine cone’s nooks and crannies to give your spider a fluffy, woolly look.
No glue needed — the pom poms wedge in securely! Want a different texture? Try bits of cotton balls for stuffing.
🎃 Make a Whole Clutter of Spiders!
One spider is fun — but a clutter of spiders? That’s Halloween magic.
Try different color combos:
Black and purple for spooky vibes
Green and orange for a festive fall look
Rainbow for silly, not-so-scary fun
Each child can give theirs a name and backstory — and you’ll have a tabletop full of creepy-cute friends in no time.
👀 Show Off Your Spiders!
We’d love to see what you and your little crafters come up with. Share your creations in the comments or tag us on social!
Looking for more Halloween pine cone crafts? 🦇 Check out our Pine Cone Bat Tutorial — it’s fang-tastic!
📌 Pin This for Later!
📢 Share This Craft!
If you loved this spider tutorial, share it with a friend or save it for later: